

THE KITE PROJECT
Purpose of the project :
-
To experience the process of development, evaluation, and documentation in the aim of creating a kite.
-
To compare and contrast a physical prototype and software prototypes.
TYPES OF KITES
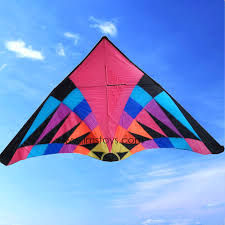
- Shaped like a triangle with a keel holding the spine straight and rigid while a spreader helps maintain its shape - One of the most popular kites - Easy to launch and fly even in a light breeze - Some have tails attached to the centre or at the wingtips to maintain stability in turbulent weather.

- Shaped like a diamond and are very easy to make - Highly reliable - Can become sturdy enough to withstand high turbulence - Have some trouble flying at steep line angles.

- Also known as foil kites - Do not have a frame, which makes them much less likely to break on impact - Have an upper and lower surface, which are further divided by vertical ribs into smaller cells. - When air fills up the pockets, the kite becomes semi-rigid and begins to fly. - May need several bridle lines to help maintain their shape - The inspiration for parachutes and paragliders

- 3-D kites which come in a wide variety of shapes - Box kites, Cody kites fall into this category - Some have an elaborate structure, wings, vanes or fins. - Typically need stronger winds to take off and say afloat since they have more frames - Slightly heavier.

- Have a single surface with vertical spars on the side to help maintain their shape - Some can be found with inflatable spars that makes them much more capable of withstanding heavy impacts during a crash - The inflatable spars also make them more portable - Often of moderate size.

- Six-sided fighter kites originated in Japan - Shaped like vertically stretched hexagons and have a four-point bridle - More stable and reliable than the delta kite, making them perfect for professional pilots - Have artistic and colourful artwork on them that look exquisite as they fly high in the air - Ideal for use in atmospheric science and kite aerial photography.

- Also known as sport kites - Known for their ability to perform impressive manoeuvres in the air. Ideal for performing kite tricks - Come in a wide variety of shapes - Most have dual-line controls, which make it easier to control how the kite flies compared to single-line controls.

Style, Design & Theme


The type of kite we chose to build is the single line delta kite. It is designed to fly well in light winds. Most Delta kites are made from cheap materials. The Delta Kite is a versatile designed kite. It can be altered slightly to suit all wind ranges. Delta Kites are described as stable, easy to handle and they are wonderful fliers.
Our design was inspired by an animation character: Toothless. It is a black dragon from the animation ‘How to Train your Dragon’. This was the picture that inspired our team to make a black dragon kite.
Our teammate Yi Xuan suggested that we make a dragon, so we searched the internet for inspiration and saw Toothless the dragon. Since everyone loves Toothless and no one had any objections, we decided that our design will be based off a black dragon, similar to Toothless.
DESIGN EVOLUTION

The first version is a lot like a dragon, as you can see, the head is clearly identifiable. However, after more consideration, we decided that this kite would be unstable and hard to fly. So we drew the second version and third version.
The second version shows the adaptations of a dragon into a more kite-like shape.
The third version looks a lot more like a kite that is realistic. The most significant changes from the first draft are the overall kite shape and the tail.
The measurements of the kite remained around the same for each draft.

Materials Needed
-
Big black garbage plastic bag x2
-
Small red plastic bag x1
-
Twisted nylon or polyester string/rope 50m
-
Lint roller x1
-
Broom stick stick x8
-
Tape
-
Glue
-
Scissors
-
Marker pens

METHOD & PROCESS


RESULTS
.jpg)
These are the results of our kite flying.
We had a total of five attempts to fly the kite, and we documented the distance the kite flew, how long it flew for, and the maximum height that our kite flew.
From these results, we calculated the mean, median, and mode.
The mean for the distance the kite flew is 12.4 meters. The mean for how long the kite flew is 6.6 seconds, and the mean for the maximum height that our kite flew is 3.6 meters.
.jpg)
Using this data we also created a graph to help visualise the results. Here is a graph comparing how long the kite flew for and the distance it flew.
On the top right corner of the graph, it could be seen that the kite flew the highest and for the longest. This is because that was our first attempt when our kite was at its best condition. After a few flies, the kite’s spine broke, which greatly affected its ability to fly. At the same time, Yi Xuan slowed down over time as he ran out of energy after running for a long time, flying the kite. These were the factors that affected the distance and height flown by our kite afterwards.

Reflection: Issues and Improvement
Issue 1: Weather

One of our problems was that there was not enough wind to fly the kite, so we made Yi Xuan run around and try to fly it.
Issue 2: Backbone

The main issue we had was halfway through flying our kite, the backbone broke. This made it hard for the kite to stay stable while flying. As you can see in the photos, the tape and glue we used to connect the two sticks were not strong enough and it snapped, creating a hole is our kite.
Issue 3: The Tail

After the first try of flying, we realised that the tail might be too heavy and might drag the entire kite down. Therefore, we decided to cut off the tail in order to reduce the weight of the kite, hoping that it would allow it to fly up higher. However, this caused our kite to look less like a dragon, and more like a stingray.
IMPROVEMENTS
-
Find a better location with more wind
-
Use longer and stronger sticks
-
Make a lighter tail end
-
Improve on designing a more attractive and better-looking kite
-
Learn and practice how to fly a kite beforehand

How does the prototype of a kite relate to software prototypes?
A prototype is a first or preliminary version of a device from which other forms are developed. We made a prototype of the kite to test how it will work and how we can improve our design. At the prototyping stage, it is possible to identify unnecessary elements that are best abandoned. Just like how we found out that the tail of our prototype kite is too heavy that it is dragging the kite down. Therefore, we know that the end part of the kite is unnecessary and changed the design.
Software prototyping is similar to prototyping a kite. It is an opportunity for the manufacturer to get an idea of what the final product will look like before additional resources, such as time and money, are put into finalising the product. Prototyping gives the software publisher the opportunity to evaluate the product, ensure it is doing what it is intended, and determine if improvements need to be made. Often, the software prototype is not complete. Sometimes, only certain aspects of the program are prototyped.